A lot of first multi camera broadcasts start the same way. A business owner opens a webinar room, turns on one webcam, shares slides, and realizes ten minutes in that the whole event feels flat. The speaker looks trapped in a tiny box, product details are hard to see, and every transition feels clumsy because the audience never gets a better angle.
That problem usually isn't about charisma. It's a production problem. When viewers only get one fixed shot, you force them to do all the work of staying engaged.
Beyond the Single Webcam Introduction to Multi Camera Broadcasting
Multi camera broadcast solves that by giving the audience the angle they need at the moment they need it. One shot can stay wide on the presenter. Another can show the demo table. A third can hold on the audience or the whiteboard. Instead of asking viewers to sit through a static feed, you direct attention for them.
That's why the model became standard in live production. The modern multi-camera television production workflow uses several cameras, often two or more, to capture different angles at the same time and live-switch between them. It became the default for live events, talk shows, sports, and other real-time formats where retakes don't make sense, as described in Ikan's overview of single vs. multi-camera productions.
For a small business, that same logic applies to webinars, training, virtual town halls, and product launches. If the session includes Q&A, demonstrations, guest speakers, or anything unpredictable, continuity matters more than cinematic perfection.
What changes when you add a second angle
A simple example makes the value clear:
- Sales demo webinar: One camera stays on the presenter, the other stays on the product table or device screen.
- Coaching session: One angle shows the instructor, another shows the whiteboard or physical teaching materials.
- Clinic training session: One shot frames the lead speaker, another isolates the procedure area or teaching model.
- Town hall: One camera handles the main stage, the other stays ready for moderator reactions or audience interaction.
None of that requires a TV truck or studio crew. What it requires is a decision: stop thinking of video as a meeting feed and start treating it like a live program.
Practical rule: If the audience needs to see more than one thing clearly during the same session, a single webcam is usually the wrong tool.
Why small teams should care
The biggest myth in this space is that multi camera broadcast is only for broadcasters. It isn't. The workflow came from broadcast, but the gear and software have become accessible enough that a small team can run a polished show with basic planning and a restrained setup.
The mistake I see most often is not under-spending. It's overcomplicating too early. People add too many cameras, too many adapters, too many apps, then lose reliability on show day.
A small organization usually gets the biggest lift from a two-camera setup that's easy to repeat. One clean presenter shot plus one purpose-built secondary shot will outperform a messy four-angle production every time. If you're running webinars, that improvement is practical, not theoretical. It makes the event easier to follow, easier to brand, and easier to trust.
Planning Your Setup Gear and Budget
The good news is that a professional multi camera live stream doesn't have to start with a giant equipment list. One practical guide notes that a setup can start with just two cameras, and estimates a complete two-camera wireless setup at roughly $1,000 to $1,500 on top of existing camera gear, according to Jerad Hill's multi-camera live stream setup guide.
That number matters because it changes the conversation. You're no longer comparing yourself to a television studio. You're deciding how to spend a modest production budget in a way that creates a visible jump in quality.
Camera choices that make sense
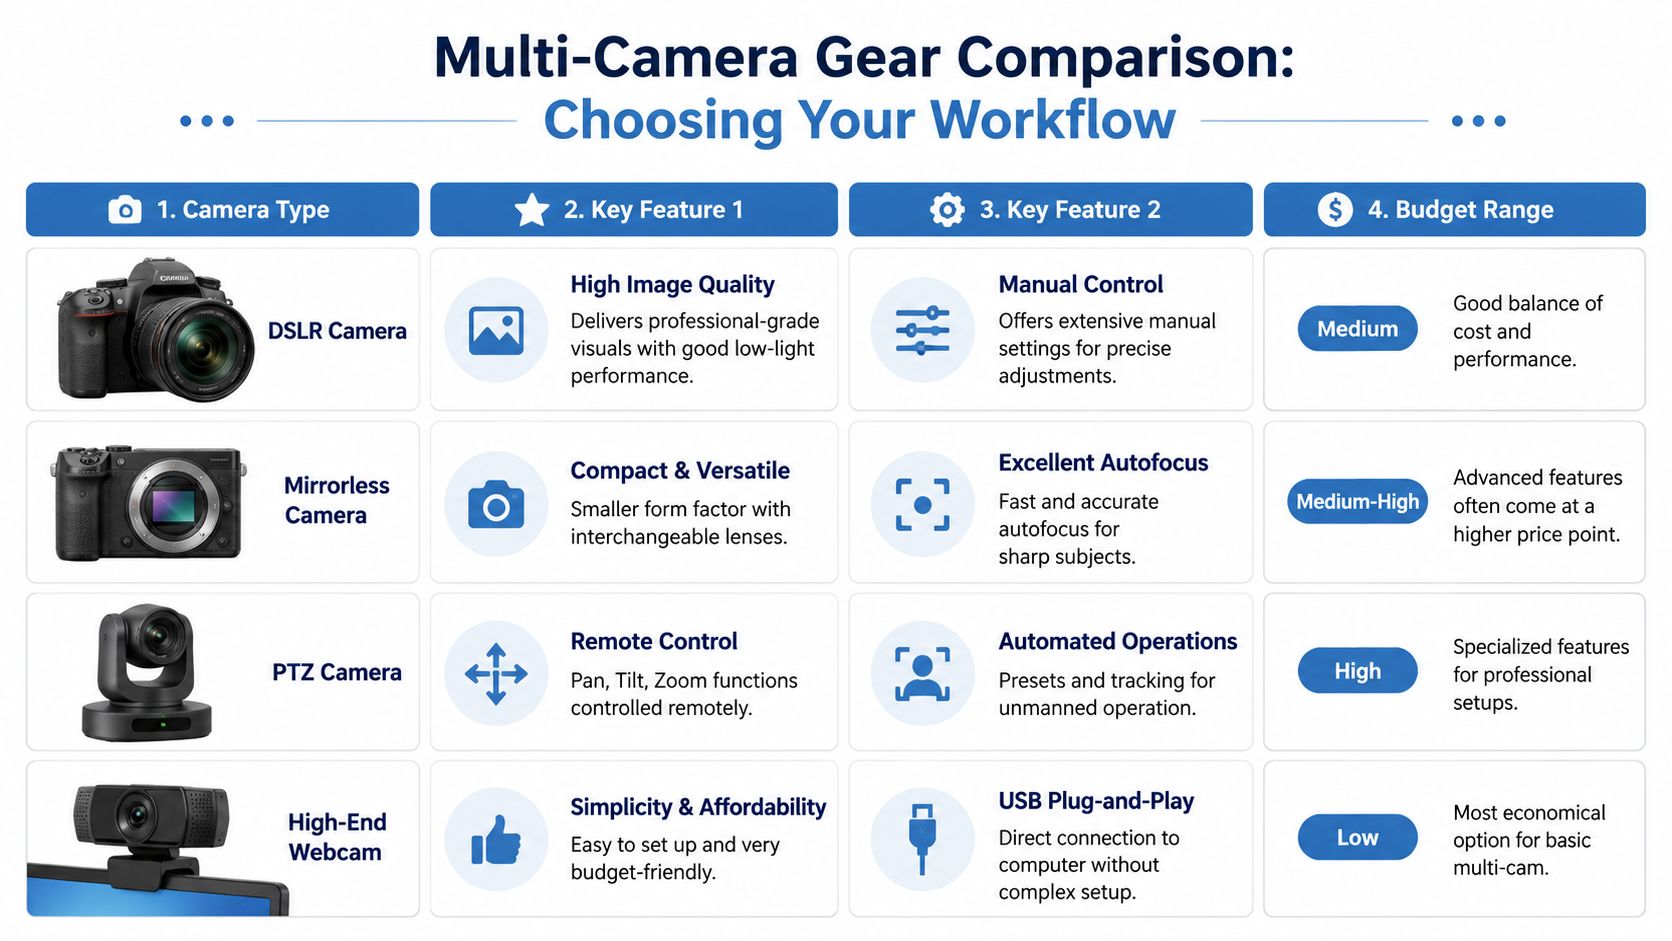
You don't need every camera type. You need the type that fits your room, operator count, and tolerance for setup friction.
| Camera type | Where it fits | Trade-off |
|---|---|---|
| High-end webcam | Desk webinars, coaching, quick internal streams | Fastest setup, least control |
| DSLR | Presenter-led webinars, marketing videos, product shots | Strong image quality, more setup discipline |
| Mirrorless | Hybrid events, mobile kits, frequent production | Excellent autofocus and flexibility, usually higher spend |
| PTZ camera | Boardrooms, training rooms, recurring installs | Remote control is useful, but cost and setup climb fast |
A webcam pair is the easiest route if your team wants plug-and-play. A DSLR or mirrorless mix gives you stronger visuals, but you need to manage power, clean HDMI output, mounting, and heat. PTZ cameras shine when nobody can physically operate the camera, but for many small businesses they solve a problem you don't have yet.
Good, better, best for a small business budget
Here's how I'd think about spending.
Good: Two quality webcams, basic lighting, and a simple switching workflow. This works for webinars, online classes, onboarding, and live demos where ease matters more than cinematic depth.
Better: One webcam plus one mirrorless or DSLR for the hero shot. Use the webcam for the wide or utility angle and the interchangeable-lens camera for the presenter or product close-up. This is a strong value setup because the audience notices the main shot most.
Best for most small teams: Two dedicated cameras with fixed roles, solid tripods, reliable audio, and either a hardware or browser-based switching path. Not flashy. Repeatable.
Two cameras usually beat three when the team is new. The third angle often adds more decision-making than actual value.
Where the money should really go
Small teams often overspend on camera bodies and underspend on the boring items that keep the show alive.
Prioritize these first:
- Reliable mounts: A shaky shot makes every camera look cheaper.
- Power continuity: Dummy batteries or AC power matter more than a slightly better sensor.
- Clean signal path: Good HDMI cables and sensible cable lengths prevent mystery failures.
- Audio gear: Viewers will stay with average video longer than they'll stay with inconsistent sound.
- Lighting: A modest light in the right place can do more than a camera upgrade.
Do you actually need three cameras
Many new producers get lost. Multi camera production starts at two, and some guides say three or four cameras are ideal for a more polished result. But there isn't clear data showing exactly when the extra angle outweighs the extra staffing, switching, audio, lighting, and failure risk for small events, as noted in Nearstream's multi-camera live streaming guide.
For most webinars and business broadcasts, ask one question: What unique view does the extra camera provide?
If the answer is vague, skip it.
A useful two-camera example looks like this:
- Camera 1: Medium shot of the host at eye level
- Camera 2: Overhead product shot or side-angle demo shot
A weak three-camera setup often looks like this:
- Camera 1: Wide presenter
- Camera 2: Slightly different wide presenter
- Camera 3: Another presenter shot that adds little
That third camera doesn't improve the audience experience much. It mainly gives the operator one more thing to monitor.
Choosing Your Switching Workflow
Switching is where your show either feels intentional or amateur. Good switching gives the audience the right shot without drawing attention to the mechanism. Bad switching feels late, random, or frantic.
You have three practical paths: a hardware switcher, software on a computer, or a browser-based platform that handles the job inside the meeting or webinar workflow.
Hardware switchers for tactile control
Hardware switchers appeal to people who want a physical button under their fingers. That's a real advantage. In a live environment, tactile control reduces hesitation. You can feel the cut button. You can keep your eyes on the program monitor. You're not hunting through windows on a laptop.
The downside is obvious once the setup grows. Hardware adds another device, another power requirement, another set of cables, and another layer of troubleshooting. If your team is already nervous, dedicated hardware can either bring confidence or add pressure. It depends on who's running it.
A hardware switcher makes the most sense when:
- One person is assigned to switching
- The room is permanent or semi-permanent
- You want a dependable routine that rarely changes
Software switching for flexibility
Software switching is the most forgiving place to learn. Tools like OBS let you build scenes, add lower thirds, route audio, and rehearse your cuts before you go live. It's flexible enough for a serious webinar program and accessible enough for a small team to practice on.
What software gives you in flexibility, it takes back in operator attention. A laptop running switching, graphics, audio monitoring, chat, and encoding can become crowded fast. If your computer is old or overloaded, the show will tell on you.
A lot of teams improve quickly when they adopt repeatable scene logic. That's one reason I like TimeSkip's video workflow tips. Their workflow framing is a useful reminder that consistency in process matters more than chasing gear.
Browser-based control for simpler events
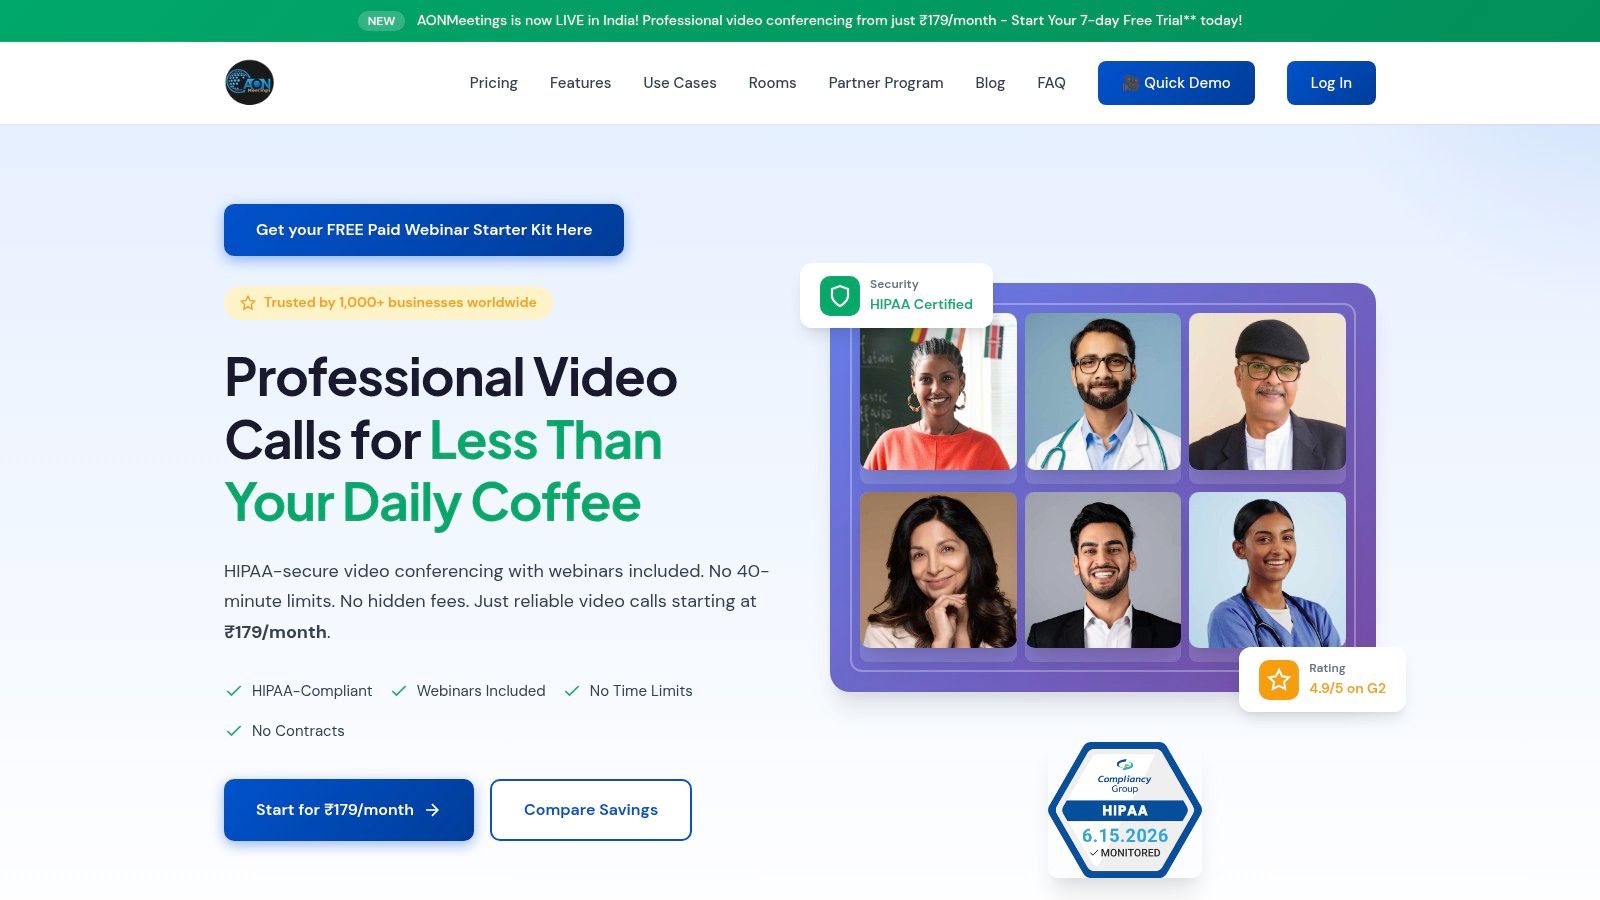
If the event is more webinar than broadcast, a browser-first path can reduce friction. Some teams don't need a separate streaming stack. They need a platform where hosts can join quickly, switch between cameras, share screens, moderate the room, and keep the session secure.
That's where AONMeetings fits as one practical option. Its browser-based platform supports webinar workflows, screen sharing, recordings, multi-camera broadcast, and bank-level encryption, which matters when the session includes internal training, client conversations, or regulated information. If screen-sharing is part of your show, their guide on how to share your screen smoothly is worth reviewing before rehearsal.
Which workflow I'd pick for each situation
| Situation | Best fit | Why |
|---|---|---|
| Small webinar with one operator | Browser-based | Lowest friction, fewer moving parts |
| Marketing stream with overlays and branded scenes | Software | More control over visuals |
| Recurring in-room event with dedicated operator | Hardware | Fast live control and repeatability |
If the switching method makes the host nervous, it's the wrong method for that event.
The right workflow is the one your team can repeat calmly. Reliable production beats fancy production every time.
Mastering Audio and Sync for Flawless Production
If your cameras are decent and your switching is competent, audio becomes the deciding factor. People will sit through a soft image. They won't stay through echo, distortion, level jumps, or speech that lands out of sync with the mouth.
Build one audio path, not several
The main rule is simple. Don't let your active camera determine your active audio. If each camera carries its own microphone and your sound changes every time you cut, the show feels broken immediately.
Use a primary audio source that stays consistent regardless of the shot:
- Lavalier microphone: Best when the speaker moves around during a training, webinar, or demo.
- Shotgun microphone: Useful when the presenter stays near one position and you want a cleaner on-camera setup.
- Desktop microphone: Fine for fixed desk presentations, interviews, and solo webinars.
- Mixer or switcher audio input: Smart when you have multiple speakers or need one controlled master feed.
A simple webinar example works like this. The host wears a lavalier. Both cameras feed video only. The lav goes into the mixer or switching path as the single main audio source. When the director cuts from presenter shot to product shot, the voice stays exactly where the viewer expects it.
Why sync problems happen
Audio and video drift for a few common reasons:
- Different processing speeds: Cameras, capture devices, and software don't all process signals at the same pace.
- Mixed signal paths: One camera may go through a different adapter or route than the other.
- Computer load: If the machine is switching, encoding, and recording at once, delays become more noticeable.
- Unmatched settings: Inconsistent frame rates across cameras can create timing weirdness that looks like sync trouble.
Fix sync before you go live
Use this sequence in rehearsal:
- Clap test the system. Put one person on camera and do a visible hand clap.
- Watch the lips and listen. If the sound lands before or after the motion, note the direction of the problem.
- Centralize audio if possible. Feed audio through one main source before it reaches the computer.
- Set audio delay in software if needed. If your video arrives late, delay the audio to match.
- Test every scene. A sync fix that works on one scene can fail on another if routing changes.
Good sync work is boring on purpose. The audience should never notice it.
Echo and room mistakes that ruin clean sound
Echo usually comes from one of three things: open speakers in the room, multiple live microphones hearing the same voice, or the conferencing platform picking up audio from more than one device. Before go-live, mute every unused mic, disable duplicate audio inputs, and monitor with headphones instead of room speakers whenever possible.
If your team keeps fighting repeated echo in browser-based sessions, AONMeetings has a practical walkthrough on how to stop echo on mic.
The audio setup doesn't need to be expensive. It needs to be singular, controlled, and tested. That's the standard.
Encoding and Streaming to Your Audience
Once the show is switched cleanly, you still need to deliver it without stutter, blur, or avoidable dropouts. That's the encoding stage. Your finished program feed gets compressed into a stream your platform can ingest and your audience can play back on ordinary devices.
One practical benchmark is worth locking in before you touch settings. For a stable 1080p live stream, a guide recommends at least 10 Mbps upload speed, with consistency mattering more than raw peaks, according to the earlier referenced setup guidance.

The settings that matter most
You can lose hours chasing advanced encoding options. Most first-time teams should focus on a short list:
- Resolution: Match your intended output. For many business events, 1080p is the practical target.
- Frame rate: Keep it consistent across cameras and encoder.
- Bitrate choice: Set a level your connection can hold steadily, not one it reaches briefly.
- Audio codec and levels: Speech needs clarity first. Fancy video won't save muddy dialogue.
- Keyframe and platform compatibility: Use settings your destination platform expects.
The principle is simple. Build for stability, not bragging rights.
Path one for integrated webinar delivery
If your event lives inside a meeting or webinar environment, the simplest route is often to keep production and audience delivery close together. That's useful for training sessions, secure internal broadcasts, healthcare communication, and customer webinars where moderation, chat, recording, and attendance controls matter alongside video quality.
A practical browser-based flow looks like this:
- Join with your primary host account.
- Bring in your camera sources or switched feed.
- Verify host permissions, screen-sharing access, and moderator controls.
- Run a short private rehearsal with the actual devices and internet connection.
- Start the live session and record it for replay or internal review.
If the event includes a webinar replay or compliance record, the recording path should be tested before show day, not assumed. A quick review of how to record webinars reliably helps prevent the painful mistake of finishing a strong session with no usable archive.
Path two for open streaming destinations
For public-facing broadcasts, many teams switch the show locally and send the final mix through an encoder such as OBS to platforms like YouTube Live. That flow gives you more control over scenes and graphics, but it also adds more responsibility.
The sequence is straightforward:
| Stage | What happens |
|---|---|
| Switching | Cameras and audio become one finished program feed |
| Encoding | Software compresses that program into a streamable format |
| Platform ingest | The destination receives the stream and prepares playback |
| Audience delivery | Viewers watch across web and mobile devices |
This route works well when the event is marketing-led, public, or built around brand presentation. It's less ideal when your team also needs registration controls, webinar hosting, or a secure audience environment in the same system.
Value is about consolidation
The expensive part of live production isn't always the cameras. It's stack sprawl. One service for meetings. Another for webinars. Another for live streaming. Another for recordings. Another for security requirements.
When a platform includes webinar functionality, recording, live delivery features, and encryption in one place, the value isn't just lower software spend. It's fewer failure points and less operator stress.
Your Pre-Broadcast Checklist and Troubleshooting Guide
Confidence on show day comes from preparation you can repeat. The most useful checklist isn't fancy. It's ruthless about removing surprises.
A strong multi camera broadcast workflow starts by assigning each camera a fixed coverage zone, such as one wide shot, one tight podium shot, and one audience shot. Production guidance also recommends matching resolution, frame rate, picture profile, white balance, and exposure across cameras before going live, then rehearsing transitions and verifying each video and audio source, as outlined in Ikan's guide to optimizing a multi-camera setup.
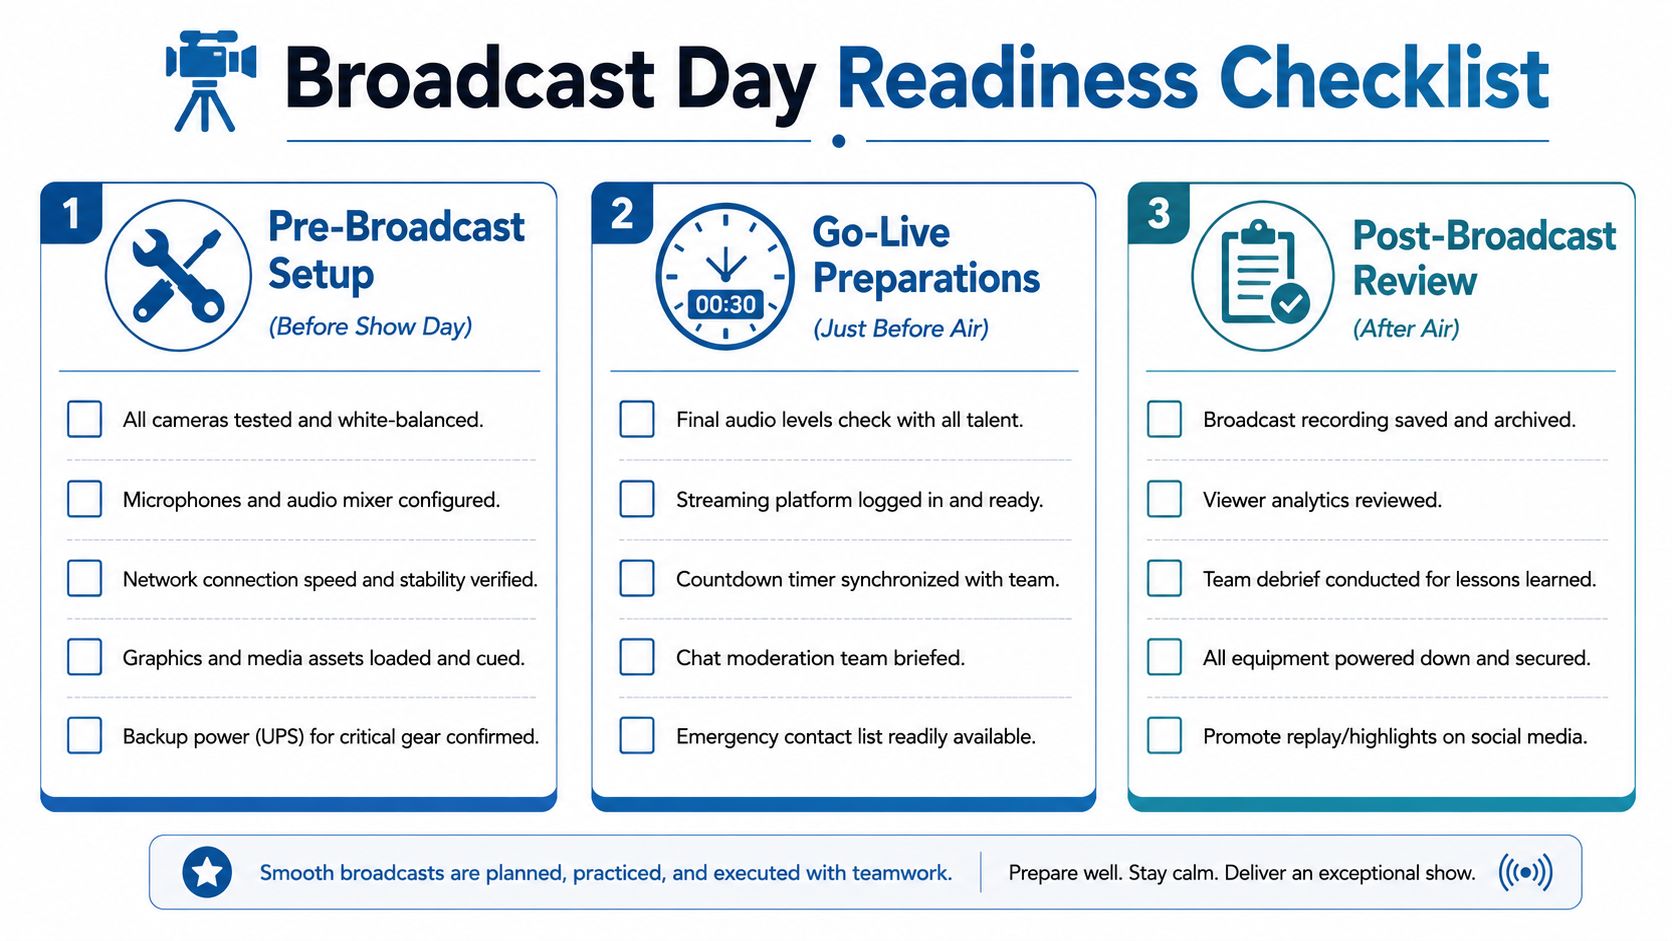
The checklist I'd use before every show
Before show day
- Lock camera roles: Decide what each camera covers and don't let angles overlap without a reason.
- Match image settings: White balance, exposure, resolution, frame rate, and picture profile should align.
- Test power and cabling: Every battery, adapter, and signal path gets checked under load.
- Build the audio path: One main audio source, monitored on headphones.
- Run a network test: You're checking consistency, not just a high number on a speed test.
Just before going live
- Open every feed: Confirm each camera appears in the switcher or platform.
- Check audio meters: Watch levels while talent speaks at real volume.
- Rehearse the first minute: Opening shot, title, speaker handoff, screen share, and first transition.
- Verify recording: Don't assume it started.
- Silence distractions: Phones down, unused apps closed, notifications off.
Fast fixes for common live problems
| Problem | First thing to check | Likely fix |
|---|---|---|
| No video signal | Cable seating and input selection | Re-seat HDMI, confirm the correct source, swap cable if needed |
| Audio buzz or hum | Power and audio routing | Move to a cleaner power source, isolate the noisy input, simplify the chain |
| Dropped frames | Computer load and internet stability | Close background apps, reduce encoding strain, move to a steadier network path |
Rehearsal should feel a little repetitive. Repetition is what turns a fragile setup into a dependable one.
Small teams don't need a perfect control room. They need a setup that behaves the same way every time. That's how you stop treating a broadcast like a gamble and start treating it like an operating procedure.
If you want a browser-based option for secure webinars, recordings, screen sharing, and multi-camera broadcast without adding a heavy software stack, AONMeetings is worth a look. It's built for organizations that need reliability, webinar capability, and bank-level encryption in the same workflow.