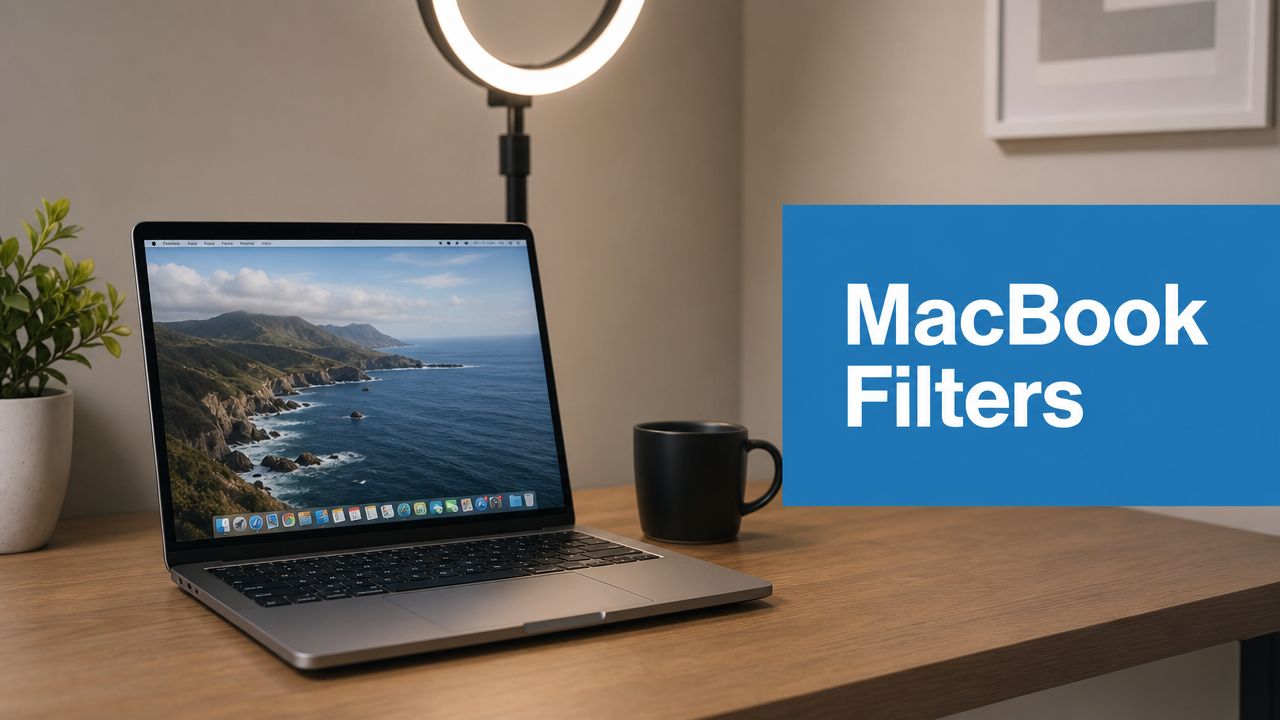
Five minutes before a client call is when MacBook camera problems become expensive. You open Zoom, then FaceTime, then Control Center. You turn on blur in one place, soften skin in another, and by the time the meeting starts, you don't look sharper. You look processed.
That's why a good MacBook camera filter setup isn't about finding the most flattering effect. It's about identifying which layer is changing your image, deciding what belongs there, and shutting off everything else. For remote work, online teaching, telemedicine, consulting, and recorded webinars, control matters more than novelty.
Users often aren't dealing with one filter. They're dealing with a stack.
Why Your MacBook Camera Needs a Strategy
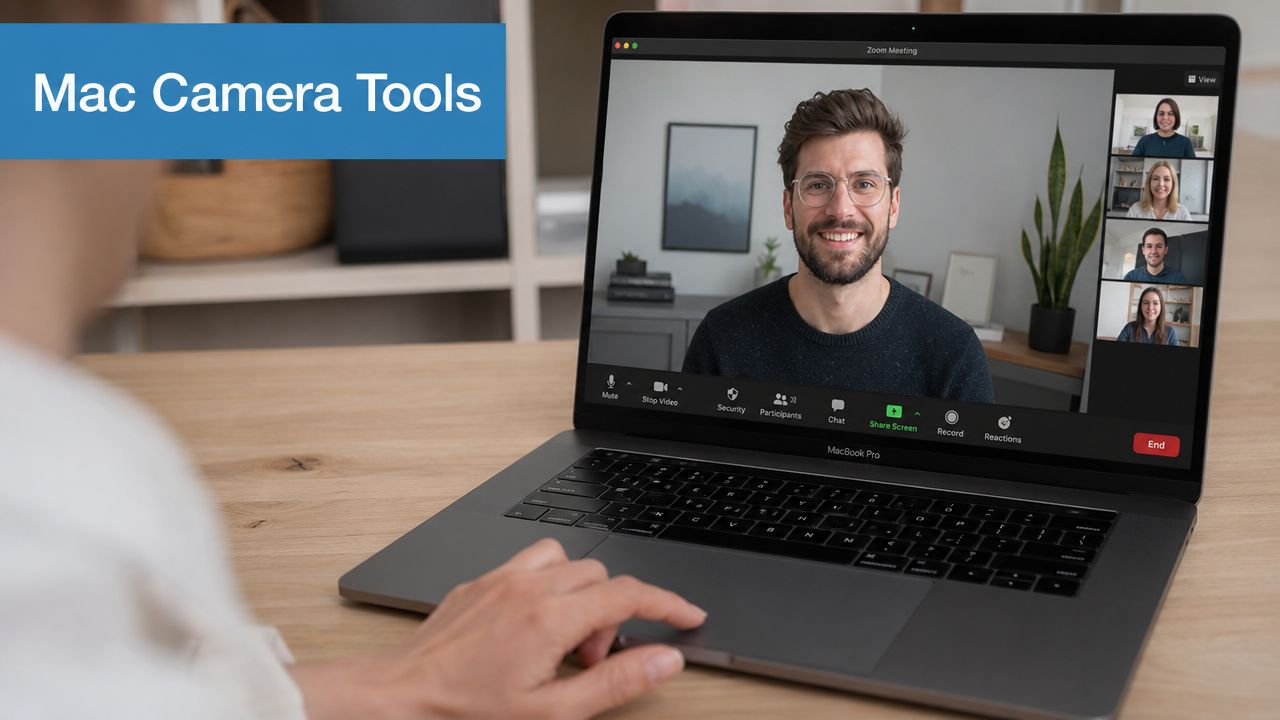
The frustrating part of MacBook video calls is that your camera feed often changes before you realize where the change came from. One toggle in macOS adds background blur. Your meeting app adds appearance smoothing. A third-party utility may add its own color adjustment or LUT. The final result can look softer, brighter, flatter, or less natural than expected.
Apple changed this workflow in a meaningful way. In macOS Sonoma, Apple introduced a system-level camera-effects framework that can apply portrait-style background blur, Studio Light, and Reactions across video apps, so your video can look different depending on which system-wide settings are active in supported apps, as discussed in the Apple Community discussion on Sonoma camera effects.
The real issue is stacked processing
A remote clinician may need a neutral, unaltered image for a consultation. A job candidate may want slight background blur but no skin smoothing. A trainer running a webinar may want stronger lighting control and a clean branded setup. Those are three different goals, but many people use the same chaotic method for all three. They click whatever makes the preview look better in the moment.
That usually backfires.
Practical rule: If you can't name which layer is affecting your face, you don't control your camera.
A useful way to think about the stack is:
- Operating system layer. macOS can apply Apple video effects before the app does anything else.
- Meeting app layer. Zoom, Meet, FaceTime, Teams, and similar tools may add appearance or background controls.
- Third-party layer. Apps like Xamera or virtual camera setups can add another round of adjustments.
What professional users actually need
For everyday team calls, a light touch is enough. For sensitive meetings, the priority changes from “look polished” to “look accurate.” That distinction matters in healthcare, legal meetings, interviews, and recorded sessions.
A strategy solves three problems at once:
- Consistency across different apps
- Privacy when you need cosmetic processing fully disabled
- Performance so your Mac doesn't heat up or drop video quality under load
If your current setup feels random, that's not a personal tech problem. It's a workflow problem.
Mastering macOS Built-in Video Effects
Start with Apple's own controls before you install anything. They're fast, integrated, and easier to manage than a pile of overlapping utilities.
Apple's camera workflow on Mac is built around the Video Effects stack. That includes Portrait mode blur, Backgrounds, Desk View, and Reactions. Hardware matters, though. Some features, including Center Stage, depend on newer devices, so effect availability isn't universal, as shown in this walkthrough of Mac Video Effects behavior.
Where to find the controls
When your video app is open and actively using the camera, look in the macOS menu bar and open Control Center. In supported setups, you'll see video controls there. That's the first place to check before you touch Zoom or any other conferencing settings.
Use this order:
- Open the target app first. Don't configure effects while the camera is idle if you can avoid it.
- Open Control Center and locate Video Effects.
- Adjust one setting at a time so you can see what changed.
What each built-in effect is good for
Portrait mode blur is the safest built-in enhancement for most professionals. It cleans up a distracting room without changing your face much. Keep it moderate. Heavy blur often creates edge artifacts around hair, glasses, and hands.
Backgrounds are useful when your environment is inconsistent. A custom photo or solid color can work well for training, sales demos, or coaching calls. For high-trust conversations, especially in healthcare or legal settings, I usually recommend a real background if possible. It looks more credible and avoids cutout errors.
Studio Light can help when your face is dim against a bright room. It's not a replacement for actual lighting, but it can rescue a call when your desk setup is less than ideal.
Desk View is practical for teaching, product walkthroughs, and document-based conversations. If you annotate paperwork, sketch, or demonstrate physical items, it can be more useful than any cosmetic filter.
What not to overuse
Reactions are harmless fun in casual calls, but they're easy to trigger at the wrong time. In professional settings, especially recorded ones, I recommend disabling them unless you actively need them.
A polished call usually comes from fewer effects, not more.
Here's the simplest built-in decision guide:
| Effect | Use it when | Skip it when |
|---|---|---|
| Portrait | Your room is distracting | Edge separation looks messy |
| Backgrounds | You need a cleaner visual setting | Trust and realism matter more |
| Studio Light | Your face is underlit | You already have good front lighting |
| Desk View | You present physical materials | You only need a head-and-shoulders frame |
| Reactions | Casual internal calls | Client, clinical, or recorded meetings |
A practical native setup
For most remote professionals, the reliable macOS baseline is simple:
- Portrait mode lightly enabled
- No Reactions
- No novelty backgrounds unless there's a real reason
- Studio Light only if your face is too dark
- Desk View only for demos or teaching
That setup looks intentional, not filtered.
Expanding Your Toolkit with Third-Party Apps
Built-in Apple tools handle the basics well, but they don't cover every use case. If you need stronger visual control, branded presentation layouts, or more stylized output, third-party tools start to make sense.
The MacBook camera filter category divides into two very different camps. One group offers lightweight enhancement inside a normal webcam workflow. The other turns your camera into a production setup through a virtual camera.
Third-party filters became popular partly because MacBook webcam hardware has often been a weak spot. Users on older models described the image as grainy and low-resolution, and tools like Xamera now advertise support for 4K camera input on Apple Silicon Macs, reflecting the move toward software-based enhancement, according to the Xamera App Store listing.
Option one is a simple filter app
This route is for people who want more than Apple offers, but don't want to build a studio.
Typical use cases include:
- Smoother exposure control for dim home offices
- Color adjustments that make skin tone look less flat
- Custom looks for creators, coaches, and presenters
- Quick compatibility with major meeting apps
Apps in this category are easier to adopt, but they come with a trade-off. The more cosmetic controls you add, the easier it is to lose a natural look. That may be fine for internal calls or marketing webinars. It's a poor choice for medical consultations or interviews.
Option two is a virtual camera workflow
A virtual camera setup is for higher-stakes presentations. Think webinars, demos, workshops, live training, and multi-scene presentations where you want overlays, slides, picture-in-picture, or branded framing.
OBS Studio is the classic example of this approach. It's powerful, but it asks more from you and from your Mac. You're managing scenes, sources, audio, lighting, and app routing. Done well, it looks excellent. Done poorly, it creates lag and confusion.
Use a virtual camera when you need production control. Don't use it just to fix a weak lamp and a dirty lens.
Price comparison and value
The brief calls for price comparison, so the honest practitioner answer is this: pricing changes often, and I won't invent amounts that aren't verified here. What I can give you is a working buyer's framework you can apply before you subscribe.
MacBook Camera Filter Software Comparison 2026
| Software | Typical Price | Best For | Includes Webinars |
|---|---|---|---|
| Apple Video Effects | Included with macOS on supported hardware | Everyday calls, quick setup, low-friction blur and lighting tweaks | No |
| Xamera | App Store pricing varies by plan and version | Users who want more filter-style controls and support for higher-quality camera workflows on Apple Silicon Macs | No |
| OBS Studio | Free, open-source | Webinars, training sessions, branded presentations, virtual camera scenes | No built-in webinar hosting |
| Meeting platform with built-in camera support and webinar hosting | Platform pricing varies by plan | Teams that want camera, meetings, recordings, and webinars in one workflow | Sometimes |
What delivers value and what doesn't
The strongest value proposition isn't “more filters.” It's fewer tools doing more jobs cleanly.
Good value looks like this:
- A simple filter app if you only need mild enhancement
- A virtual camera if you run polished training or public-facing sessions
- A meeting platform with webinar support included if your team presents regularly and wants fewer moving parts
Weak value usually looks like buying multiple cosmetic apps that all do roughly the same thing, while leaving key issues untouched: bad lighting, poor framing, and no repeatable setup.
If you host live education or client-facing sessions, don't just compare visual effects. Compare whether your workflow includes recordings, screen share, webinar capability, moderation, and reliable camera behavior without constant tweaking.
Privacy and Professionalism in Secure Meetings
A flattering filter can become a professional liability fast. In healthcare, therapy, legal review, HR interviews, and recorded advisory calls, the question isn't whether blur looks nice. The question is whether your image is being altered in a way that changes trust, appearance, or interpretation.
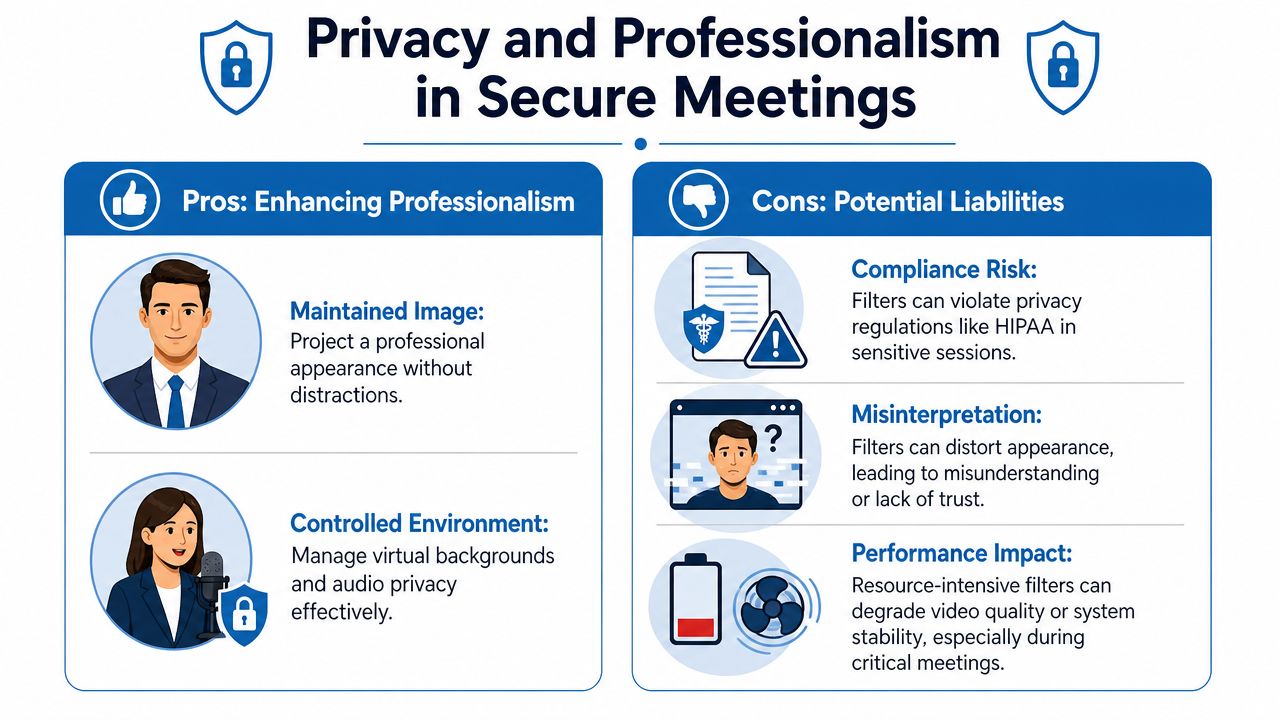
A major source of confusion is that users often can't tell whether a softened look comes from the Mac, FaceTime settings, or a meeting app like Zoom. That ambiguity matters in privacy-sensitive contexts where all cosmetic processing may need to be disabled, as discussed in this analysis of hidden video effect layers across Mac apps.
How to diagnose the source of the filter
If someone says, “Why do I look airbrushed?” don't start guessing. Isolate the stack.
Use this diagnostic sequence:
Quit all camera apps except one
Don't troubleshoot with multiple apps open.Check macOS Video Effects first
Look for Portrait, Backgrounds, Studio Light, and Reactions in Control Center.Open the app's own video settings
Zoom, Meet, Teams, and FaceTime may each apply separate appearance controls.Disable any third-party camera utility
If a filter app or virtual camera is running, turn it off and test the native webcam feed.Record a short sample
A preview window can be misleading. A short local test call gives you the truth.
Why this matters in regulated work
A clinician may need a neutral image for telemedicine. A lawyer may want the cleanest possible visual record. An HR leader may want candidate interviews that don't distort appearance.
That's where camera control meets meeting security. Visual authenticity is one part of professionalism. Data protection is the other. If you're reviewing policies for secure sessions, LunaBloom AI's Privacy page is a useful example of how organizations frame privacy expectations clearly for users.
Cosmetic control and meeting security solve different problems. You need both.
For the meeting platform itself, one practical option is AONMeetings virtual meeting best practices, especially for teams standardizing secure calling habits. The platform information provided for this article states that AONMeetings includes end-to-end encryption, webinar hosting, screen sharing, recordings, and browser-based access, which makes it relevant when secure meetings and presentation workflows overlap.
A good professional standard
For sensitive meetings, the safest standard is:
- No smoothing
- No novelty reactions
- No heavy virtual background unless privacy requires it
- Clear notice to staff about where camera effects can be enabled
- A secure meeting platform with strong privacy controls and encryption
That combination protects both appearance and information.
Performance Tips and Troubleshooting Common Issues
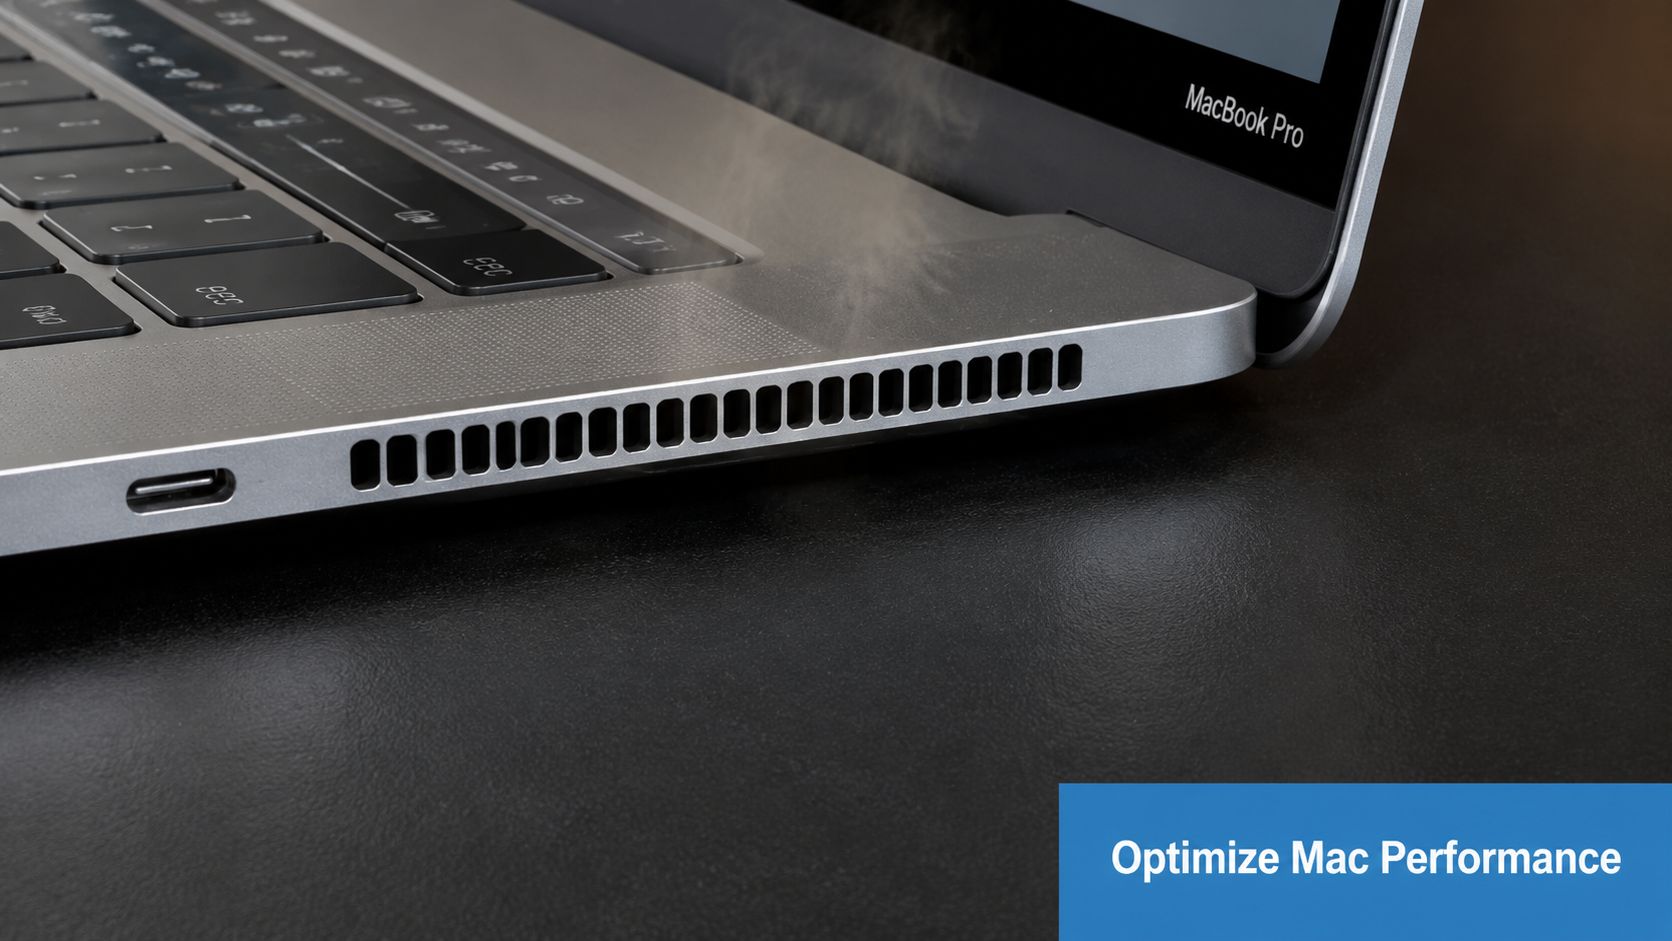
The fastest way to ruin a video call is to stack heavy filters on a weak setup and then wonder why the fan starts screaming. Camera effects cost processing power. Virtual backgrounds, smoothing, and virtual cameras all add load. If your Mac is already screen sharing, recording, and syncing cloud apps, the margin gets thin.
A practical quality limit still exists. Many MacBooks use built-in webcams that are 720p or 1080p, and common guidance says the biggest wins come from simple fixes first: clean the lens, improve front lighting, update software, and check permissions before adding enhancement software, as explained in this Mac camera troubleshooting guide from Shotkit.
Start with the fixes that actually matter
Before you install anything, do this:
- Clean the lens. A fingerprint haze can mimic bad focus and low contrast.
- Move a light in front of you. Front lighting usually beats any software brightening effect.
- Update macOS and your meeting app. Camera behavior changes with system updates.
- Check camera permissions. If the app can't access the camera correctly, filters won't behave predictably.
Use an ordered troubleshooting checklist
When the image looks wrong or effects fail, work in this order:
Confirm the camera works without filters
Test the raw feed first.Turn on one effect only
Don't troubleshoot three variables at once.Check framing under real conditions
A standing lamp, window glare, or dark background can make you think the filter is the problem.Watch for system strain
If the Mac heats up, simplify. Disable the virtual background before you disable basic camera access.Test audio too
Many “camera setup” failures are really full call-quality issues. If your meeting also has sound problems, this guide on stopping echo on mic is a useful companion.
What software can't fix
No app can create detail your webcam never captured. If the sensor is limited and the room is dim, software may brighten the image but it won't make it crisp.
Better lighting usually beats a stronger filter.
For daily work, the most stable setup is usually:
- one camera source
- one light in front of you
- one mild effect at most
- no unnecessary apps running in the background
That approach isn't flashy, but it's what holds up in long meetings.
Your Definitive MacBook Camera Workflow
A reliable MacBook camera filter workflow is simpler than commonly assumed. Start outside the computer. Clean the lens, face a light source, and frame yourself well. That does more for professionalism than chasing cosmetic effects.
Then choose your tool level based on the meeting. For ordinary calls, use macOS Video Effects lightly and keep the look natural. For classes, demos, or branded presentations, move to a third-party app or virtual camera only if you need extra control. If you run training sessions, recorded demos, or live presentations, make sure your workflow also handles practical tasks like screen sharing during meetings without breaking your camera setup.
The final step is the one many skip. Learn how to turn everything off. That means system effects, app effects, and third-party effects. If you work in telemedicine, legal services, HR, education, or any trust-sensitive role, this isn't optional. You need to know when your appearance is enhanced and when it is neutral.
The professionals who look best on video usually aren't using the most filters. They're using the fewest tools necessary, on purpose.
If you need a meeting platform that combines secure video calls with practical presentation features, AONMeetings is worth a look. The platform information provided for this article states that plans start from ₹179 per user per month, include unlimited meeting time, webinar hosting, screen sharing, recordings, and bank-level encryption, with browser-based access and no 40-minute limits. For teams that want fewer moving parts between camera setup, webinars, and secure client meetings, that kind of all-in-one workflow can reduce a lot of friction.